How to Add Subscriptions and a Paywall to Your iOS App Without Coding (2026)
An app becomes a business the day it can charge money. That step used to be the hard part — not designing the paywall, but everything underneath it: StoreKit, receipt validation, entitlements, restore flows, subscription states, and a review team that checks all of it. Plenty of first-time founders shipped a free app and never got further.
In 2026 you can add subscriptions and a paywall to a native iOS app without writing a line of Swift. This guide walks the whole path: what Apple requires, how to set up your products, and how an AI app builder wires it all into a real SwiftUI app you can test on your own iPhone.
What Apple actually requires
Before any tool can help, four things are non-negotiable on iOS:
- An Apple Developer Program membership ($99/year). It’s the only way to sign an app for a real device or the App Store. How to enroll.
- In-App Purchase for digital goods. Subscriptions, unlockable features, and premium content must go through Apple’s In-App Purchase system. Linking out to your own checkout for digital content is one of the most reliable rejections there is. Physical goods and real-world services are the exception.
- Products defined in App Store Connect. Your subscription — its price, duration, and any free trial — is created in Apple’s dashboard, not in your code. The app only references it by identifier.
- The Paid Applications agreement, with banking and tax details completed. Until that’s signed, nothing can go on sale, and Apple won’t tell you clearly why.
Plus one rule that surprises people: every paywall must offer a Restore Purchases button, so a customer who reinstalls or gets a new phone can recover what they paid for.
Why RevenueCat, not raw StoreKit
You can talk to StoreKit directly. The reason almost nobody does is that a subscription’s lifetime is messy: trials convert, cards fail, users cancel and resubscribe, family sharing kicks in, refunds happen. Handling all of that correctly is a project on its own.
RevenueCat sits between your app and Apple. It validates purchases server-side, tracks every subscriber’s state, turns products into entitlements (the app asks “does this person have Pro?” instead of parsing receipts), and hosts a paywall you can design in a visual editor and update without shipping a new build. It’s free to start and pairs with Cabano’s builder directly, which is why it’s the integration we chose.
Step 1: Build the app first, then decide what’s premium
Don’t start with the paywall. Build the app until it does its core job well — a first build takes a few minutes — and use it for a day.
Then pick the premium line. The pattern that consistently works for small apps:
- The core happy path stays free. Someone should be able to use the app for its main purpose without paying.
- One or two clearly more valuable features are Pro: unlimited items instead of a cap, history and insights, export, iCloud-style sync, extra themes, advanced modes.
Write that decision down in a sentence. You’ll paste it into the builder later, and it’s also the sentence that will become your App Store description.
Step 2: Create your products in App Store Connect
This is the part you do in Apple’s dashboard, once per app.
- Register a bundle ID and create the app record. Apple’s API doesn’t allow this to be automated, so it’s a short manual step. Create your app record walks through it.
- Create a subscription group under the app’s Subscriptions section, then add your products to it — typically monthly and annual, with the annual plan priced at roughly eight to ten months’ worth of the monthly price. Add a free trial (seven days is the common default) as an introductory offer if you want one.
- Accept the Paid Applications agreement in App Store Connect and complete the banking and tax forms.
Give the products readable identifiers (pro_monthly, pro_annual). You’ll see them again in RevenueCat and in the generated code.
Step 3: Set up RevenueCat
In RevenueCat, create a project and add an App Store app using the same bundle ID you registered in step 2. RevenueCat will ask for App Store credentials so it can validate purchases with Apple — follow its setup prompts for the In-App Purchase key.
Then define three things:
- Products — add the identifiers from App Store Connect (
pro_monthly,pro_annual). RevenueCat can import them if you connect your App Store Connect account. - An entitlement — call it
pro. Attach both products to it. This is the single switch the app checks. - An offering — the default offering with a monthly and an annual package. Offerings are what the paywall displays, and you can change them later without touching the app.
Optionally, open RevenueCat’s Paywalls editor, design a paywall for that offering, and publish it. If you do, Cabano will use it as-is; if you don’t, the builder designs one for you. Either works — the visual editor is nice if you want to A/B test copy later without rebuilding.
Finally, in RevenueCat’s project settings, create a secret API key with read access to products, offerings, entitlements, and paywalls. That key is what you’ll hand to Cabano in the next step.
Step 4: Connect RevenueCat in Cabano and build the paywall
Open your project in the builder and press the RevenueCat button in the toolbar, next to the preview. Paste the secret key.
Cabano imports your catalog — products, offerings, entitlements, and whether a paywall is published — and shows it in the dialog so you can confirm it matched what you set up. The secret key stays on Cabano’s servers; the only thing that ships inside your app is RevenueCat’s public SDK key, injected at build time so it never appears in the generated source.
Now press Build paywall. That sends a prompt you could equally type yourself:
Add in-app purchases to this app with my connected RevenueCat products. Gate the app’s premium features behind the subscription entitlement, and add the paywall: use the paywall I built in RevenueCat if one is published, otherwise design a polished paywall screen from my offerings. Include a restore-purchases button and graceful loading and error states.
If you want control over what’s premium, add your sentence from step 1: “Unlimited habits and the weekly insights tab are Pro; everything else stays free.”
What the AI does with it is real engineering, not a template:
- Adds the official RevenueCat SDK to the Xcode project via Swift Package Manager.
- Configures it at launch with the injected key and creates a single subscription store that listens for entitlement changes — so unlocking Pro on one screen updates every gate in the app instantly.
- Gates the premium features you named on the
proentitlement, never on a locally stored flag someone could flip. - Presents the paywall: RevenueCat’s published paywall if one exists, otherwise a custom SwiftUI screen that lists your packages with live prices from the App Store, handles the purchase, and includes Restore Purchases plus the terms and privacy footnote App Review expects.
- Handles the unglamorous states — loading, a store that returns nothing, a cancelled purchase, a network failure — without ever making the app unusable.
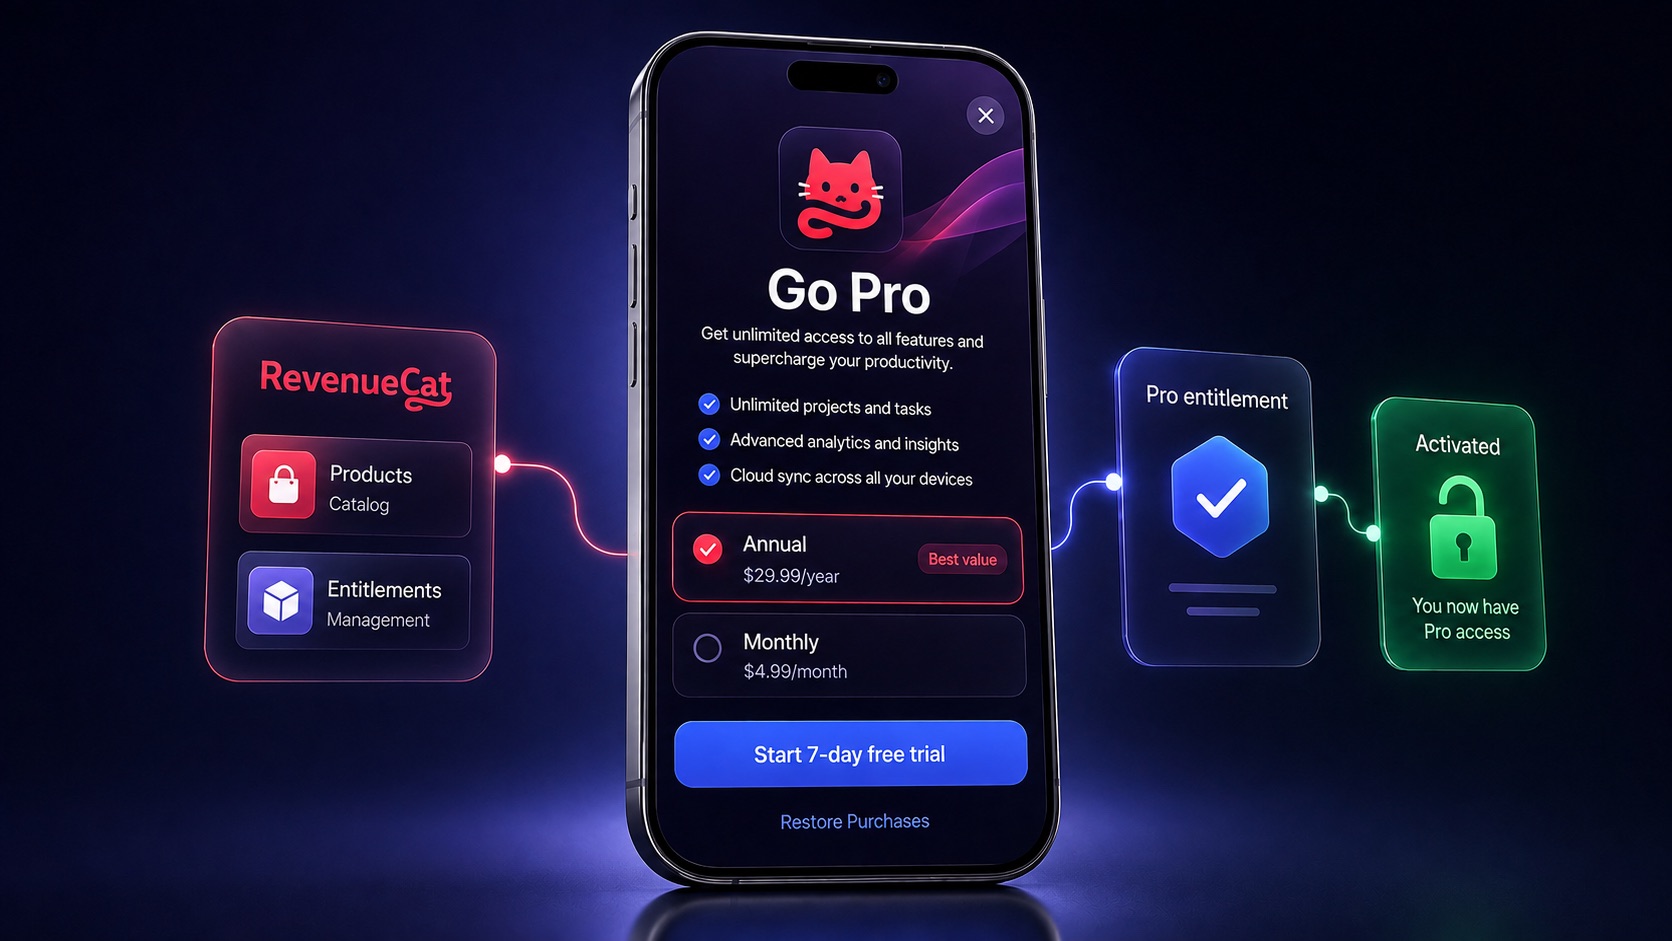
Iterate the way you iterate on anything else in Cabano: “make the annual plan the highlighted default,” “add a comparison of free vs Pro above the buttons,” “show the paywall when someone hits the free limit instead of at launch.”
Step 5: Test real purchases on your iPhone
The live simulator preview is great for checking layout and flow, but the App Store doesn’t serve real products to the simulator, so the paywall may show an empty or “unavailable” state there. That’s environmental, not a bug — the builder is told to leave it alone rather than fake it with placeholder products that would shadow your real ones later.
The real test is on your own phone. On any paid plan, press Run on my iPhone and Cabano signs the build with your Apple Developer account and delivers it to TestFlight — no App Review involved. How the TestFlight lane works.
In a TestFlight build, purchases run in Apple’s sandbox: you go through the real purchase sheet, nothing is charged, and subscriptions renew on an accelerated clock so you can watch a “month” expire in minutes. Create a sandbox tester in App Store Connect under Users and Access, sign into it on your phone, and buy Pro. Then check three things:
- The gated features unlock immediately after purchase.
- Delete and reinstall the app, tap Restore Purchases, and confirm Pro comes back.
- Open the RevenueCat dashboard — the sandbox purchase should appear as a customer with an active
proentitlement.
If all three pass, the money path works end to end.
Step 6: Pricing defaults that don’t need a spreadsheet
You’ll refine pricing with data later. To launch, these defaults are hard to get badly wrong:
- Freemium over hard paywall. A paywall on first launch converts a smaller share of a much smaller audience. Let people fall in love with the free version, then meet the wall at a natural limit.
- Monthly plus annual, annual highlighted. Two choices is the sweet spot. One is too few, four is a spreadsheet.
- A short free trial on the annual plan. It makes the bigger commitment feel safe to try, and the customer who converts is worth far more than a monthly one.
- Round-ish prices. $4.99/month and $29.99/year reads like a consumer app. $3.42 reads like a spreadsheet.
Whatever you pick, App Store Connect lets you change it later, and RevenueCat’s offerings let you test alternatives without shipping a new build.
Before you submit for review
Most paid-app rejections come from the same short list. Before you press Publish, confirm:
- The paywall states the price, the billing period, and that the subscription auto-renews, with links to your terms and privacy policy. Cabano’s generated paywall includes these; if you customized the design heavily, check they survived.
- Restore Purchases is present and works (you tested it in step 5).
- Nothing links to a website checkout for digital content.
- The free part of the app is genuinely usable, so the reviewer can evaluate it without buying.
- The Paid Applications agreement is fully signed. Half the “why won’t my product show up” questions end here.
The full list is in Passing App Review.
What this used to take
A year or two ago, this guide would have been a Swift tutorial: StoreKit 2 transaction listeners, entitlement caching, a paywall built by hand, and a weekend of testing edge cases. That work hasn’t disappeared — it’s just being done by an agent that has done it hundreds of times, against your real product catalog, inside a native app that Apple’s toolchain compiled.
Earnings go where they should: your app publishes under your Apple Developer account, so Apple pays you directly. Cabano is the tool, not a partner in the revenue.
One current limit worth knowing: RevenueCat connections are available for iOS apps, not for Cabano’s native games yet.
Build your app, get it working, and then come back to this page for the part that turns it into a product.